DIY face masks #1
Saturday, February 20, 2016
Hello you fluffy human being .。;・+ヾ(♥◕ฺ∀◕ฺ)ノ゚:。・+
I may not be a products person, a make up person, but my DIY face masks path started around 5 years ago! I am more towards the natural things I guess~ I am a huge fan of DIY facial masks because they are made from products in my food cupboard or fridge and it is much more convenient and ofc. a whole lot cheaper. I mean you will never waste anything as everything will end up going down your stomach some day.
Before we start, I want you remind you that DIY facial masks are not suitable for every skin types; especially acne-prone ones. This is simple because acne-prone skin is more sensitive and they require more care. Please double, triple and quadruple check your skin type + heaps of research prior to trying any DIY facial masks.
DIY facial masks are unlikely to have the same effect as those chemically developed ones. This is simply because those developed ones have chemicals and other substances that are combined together for an instant effect.
DIY facial masks are unlikely to have the same effect as those chemically developed ones. This is simply because those developed ones have chemicals and other substances that are combined together for an instant effect.
To test whether or not the DIY facial mask is suitable for you, you could apply some on your inner wrist and if there is no reaction or redness, then it should be fine for you. However, this test isn't 100% accurate so I still recommend researching + asking professionals.
Prior to applying any type of facial masks, it is best to somehow open your pores first. You could do masks straight after a shower because shower steams often open up your pores + you've washed your face and it is more efficient.
Prior to applying any type of facial masks, it is best to somehow open your pores first. You could do masks straight after a shower because shower steams often open up your pores + you've washed your face and it is more efficient.
The ones I will be sharing with you today are ones I've tried and they do some sort of magic to my skin. I have oily + normal (combination) skin.


 Yoghurt + Honey + Oatmeal
2 tbsp of natural non-sweetened yoghurt, 1 and 1/2 tsp of honey, 1 tbsp of oatmeal
Instructions:
Wash your face + apply toner.
Apply the mixture on your face.
Wash everything off after 15 minutes.
Continue with your skincare routine.
I don't normally wash my face with face wash again afterwards but you can if you want~
Do this once or twice a week.
This facial mask is best for combination, normal, dry and oily skin. However, sensitive skin and acne-prone skin have mixed reviews for this mask~ Some sensitive and acne-prone skins love this but some have had terrible reaction with the yoghurt. Because yoghurt is usually kept in a fridge, it will be cold but this is really good as it gives a cooling + soothing effect!
 Natural Unsweetened Yoghurt
I picked up this yoghurt from Pak'n'Save.
Yoghurt contains a variety of vitamins (rich in vitamin B's - hydrates + brightens + regenerates), lactic acid (dissolves dead skin cells + prevent break outs + diminish appearance of lines and wrinkles), zinc (good for pimples and acne + tighten tissues + reduce redness), calcium (heals dry skin).
I only recommend plain yoghurts because the ones with fruits, ones that are flavoured can be too acidic and cause inflammations. If you only use yoghurt (without other ingredients), exfoliating will not be as decent compared to actual exfoliating products. Exfoliating only works with the pH of 3 - 3.5 but most yoghurts are around 4- 4.5 pH wise.
I am normally too lazy to use all the ingredients so I only use yoghurt majority of the time.
 Honey
Honey
My mum buys our honey but you can find honey almost at every supermarket.
Honey is basically one of the most high-rated ingredients among all DIY facial masks ingredients, it is basically like one of the gods or goddesses! Acne is naturally antibacterial (good for acne treatments + preventing acne), contains antioxidants (slows down ageing), it gives complexion boosts (moisterising + soothing + gives your skin a glow), and honey clarifies pores (opens pores + unclogs them).
Honey can be a face mask on its on! Basically all you do is smear it all over your face + wait 15 minutes and wash the mask off. Make sure you clean thoroughly because if it is not, it will clog your pores back and cause break outs.
Honey + yoghurt can be used on their own! If you have oily skin, you could also add a squeeze of lemon juice to control oil.
 Oatmeal
It doesn't matter which types of oatmeal you purchase because they are pretty much all the same.
Oatmeal contains polysaccharides (prevents dull and dry skin), healthy fats (moisturising), proteins (maintains your skin's natural barrier), saponins (gently removes dirty and oil from pores).
Oatmeal + yoghurt brightens your skin and it also exfoliates quite nicely, well for me that is. Therefore, you can use just these two if you don't have honey laying around. Oatmeal cannot be used on its own because it will just fall off your face~
 Aloe Vera Gel + Pearl Powder
1 and 1/2 tsp of the gel, 1 tsp of pearl powder + a drop of water
Instructions:
The mixture should be a light green paste with some undissolved white pearl powder bits.
Wash your face + apply toner.
Apply the mixture on your face.
Wash everything off after 15 minutes.
Continue with your skincare routine.
I don't normally wash my face with face wash again afterwards but you can if you want~
Do this twice or three times a week.
I think this face mask is suitable for all skin types; even those who has acne said this face mask had done wonders to their skin! I have combination skin and this facial mask has been good to both parts of my skin so I guess it is suitable for everyone. Once again, please test it on the inner sides of your wrist before applying it to your face!
The main effects of this mask are: brightening, lightening + diminishing spots (scars, freckles), hydrating and oily control. Oh and it diminishes appearances of black heads~
 Aloe Vera Gel
My mum bought this but you can find these gels in drug stores and supermarkets.
If you have read my skincare routine, you probably remember this tube! I use it as a "sleeping mask"~ Basically I massage a layer of this into my face and leave it in for the whole night. I've always woken up the next day with really hydrated and softer skin. There won't be any excess oil around my forehead.
Aloe Vera itself is another highly rated ingredient, however it isn't as recognised as honey~ Aloe Vera gel can be used on almost everything: bug bites, pimples, burns, rashes and many more. In China, it is called 万能胶.
Aloe Vera gel includes vitamin E (protects and repairs skin), vitamin C (anti-ageing + brightening), peroxidase (lightening skin complexion), minerals and enzymes that tightens your skin as well as preventing melanin forming on your skin.
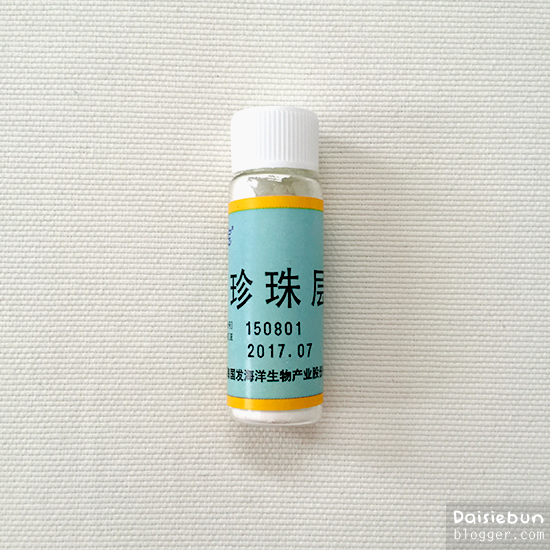 Pearl Powder
I got this from a local drug store in China; my aunty is a nurse and her workmates just told us to get these from drug stores because I was fishy about getting these from supermarkets.
Pearl powder can actually be using with water! You mix this and water together, creating a white paste and the you just apply this onto your face~ The lady at Watson's told me to use pearl powder with water because I complained to her about black heads. Yes, this powder actually helps to diminish black heads and I've seen almost an instant effect on myself!
Pearl powder includes: glycine (hydration in and out). methionin (brightening + firming and elasticity), alkaline phosphatase (APL, anti-agent). Pearl powder is basically for brightening, removing dark spots and anti-ageing.
Pearl powder does have side effects and not everyone praises this powder. An overuse of pearl powder will harm your skin, more than most other DIY facial mask ingredients.
 Eggs
Eggs
Separate and whisk egg white and egg yolk.
Instructions:
Wash your face + apply toner.
Apply the whisked egg white on your face.
Reapply it whenever it starts to tighten and dry up.
Repeat the previous step as much as you need to in 15 minutes.
Cleanse everything off with water.
(Egg whites are suitable for combination, sensitive and oily skins)
Apply egg yolk.
Leave in for 15 minutes.
Cleanse everything off with water.
(Egg yolks are suitable for dry skin)
I recommend washing your face with a mild face wash after this, because the eggy smell is yuck.
Do this once or twice a week~
You can get eggs at almost any food-related stores, I mean you can even steal one off a restaurant. This facial mask is not suitable to those who are allergic to eggs. I actually found this mask through Bubzbeauty: the egg white is for tightening and the egg yolk is for moisturising afterwards. However, I only do the egg white bit because I don't like how the egg yolk feels on my face, too sticky ; n ;
Egg whites dry up really fast and that's why I recommend reapplying over and over again~ Egg whites can be used to remove blackheads: simply soak a cotton pad into the egg white + put it onto your nose. Strip it off when it completely dries. Egg whites are high in collagen and vitamin A. Vitamin A is essential for developing substances that are able treat burns and scars. Egg whites are for firming and elasticity. It also lessens folds and lines!
Egg yolk can make your skin appear more yellow if you use it too much on your face. This is also why I only stick to the egg whites. However, egg yolk is known for its hydrating and moisturising qualities~
Here are three DIY facial masks I've done lately and always had great results~ I cannot stress enough about being really careful with DIY face masks because everyone has a different skin type, skin complexion and these masks will not be suitable for everyone. I hope you like these three DIY masks and I do have a few more to recommend; this is why this is part one only u w u
0 comments